Adding an individual Register
To add a register, select the relevant project from the Performance report section on the home screen or from Projects. Once you are in the project click on Sessions List.

The icon to the right of each session indicates the status of the register:


Draft registers do not count towards your statistics until they are submitted. Once a session with a draft register is in the past the session will appear with an exclamation mark as unsubmitted. You can edit a draft or submitted register at any time.
Use the filters on the right-hand side of the session list to help you find the relevant session. Once you have located the relevant session, click Add register.

When you click Add register you will be presented with two options,Start with an empty register and Copy attendees from another register.
Note: 'Copy attendees from another register' will only appear if there are existing registers within the project.

Registers can also be added and managed using the Upshot Mobile App.
Starting with an empty register
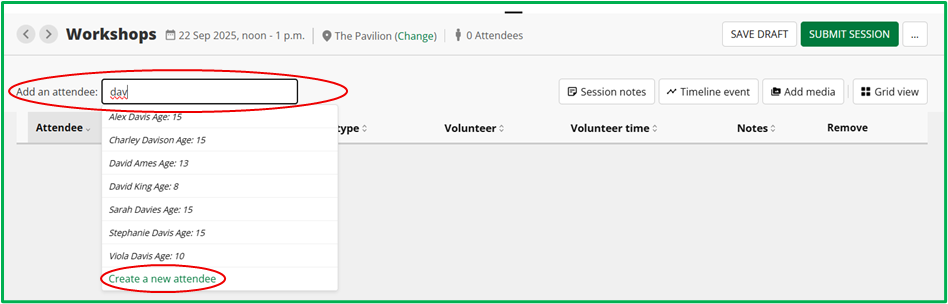
Choosing this option will take you straight through to a blank register. From here you can search for the name of an attendee you want to add to the register in the Add an attendee bar. Click on their name to add them to the register. Repeat this process for every attendee.
If the person you are looking for is not on the system you can click on CREATE A NEW ATTENDEE from within the dropdown. This will add them onto the register and to the system, so you will not need to enter all their details again.
Copy attendees from an existing register
If you choose to copy attendees from an existing register you will be given two options:

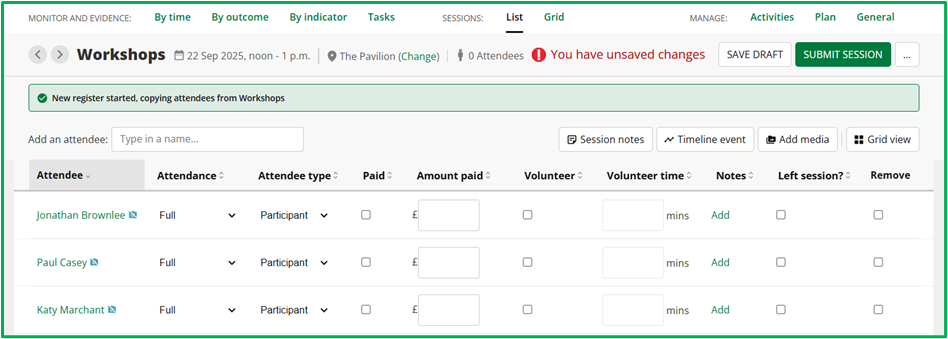
Once you click GO, attendees from the copied sessions will be added to the register. You can still add existing attendees to a copied register or remove attendees from the list.
Submitting Registers
Within a register you will find a variety of built in columns where you can add OPTIONAL extra detail about an attendee for that particular session. Users with the System Admin role can also create custom register fields to capture further data related to each participant.
For more information about configuring the default register fields and creating custom register fields, see our guide here.

Register icons

A camera with a line through, shown against an attendee's name, indicates that the organisation does not have photo or other media consent for this attendee.

A orange asterisk, shown against an attendee's name, indicates the attendee has a medical condition. Note this icon is based on the default Medical Conditions fields, whether a selection is added from the 'Specific Medical Conditions' drop-down - other than 'No known medical conditions' - or the free text box 'Any other medical conditions'.
Note: If these default fields are not currently displayed on your account a System Admin can amend this by going to Admin > Data Display options. More on this here.