Adding Timeline Events to participants profiles
Timeline events can be added to an individual attendee directly from their participant profile, or one or more individuals via a Session Register.
Adding Timeline Events to an Individual Attendee
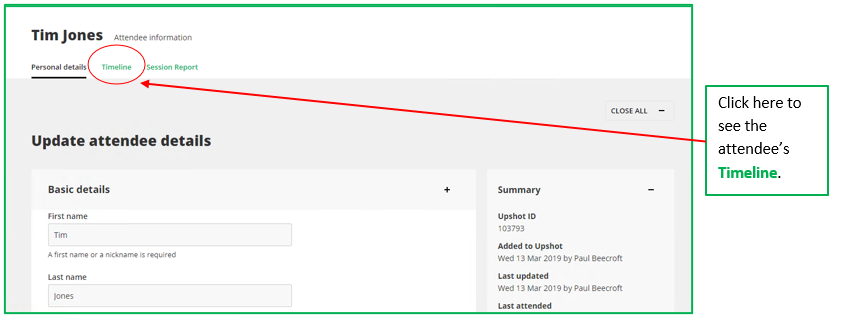
To view an attendee’s profile, simply type their name in the search bar at the top right of the page and click on their name when it appears. Alternatively click on the attendee’s name within a register.

When viewing an attendee’s profile, you can see their timeline by clicking on Timeline.
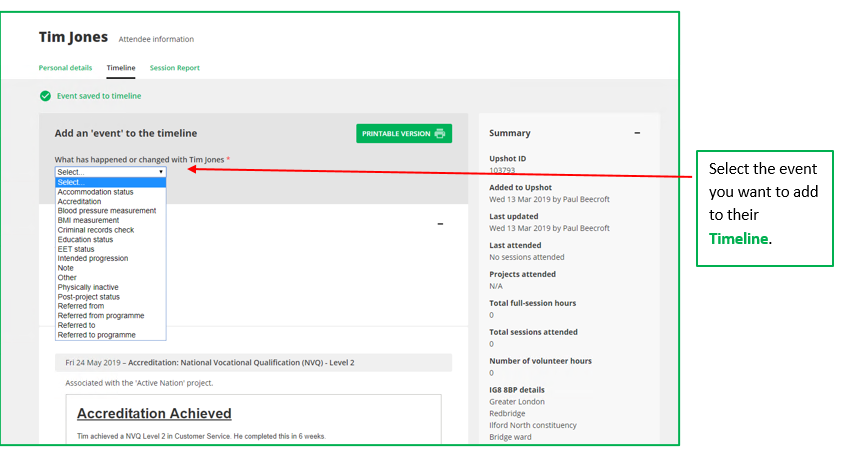
To choose a new event to add to their timeline, select an option from the drop-down menu that best reflects what has happened or changed for an attendee. This could be anything from achieving a new qualification to passing a criminal record check.
If there isn’t an event that describes what has happened to your attendee, you can select
Other, Note or ask your System Admin User/Upshot Support to add a
Custom timeline event to accurately record what has happened to the attendee. For more instructions around this process please click
here.
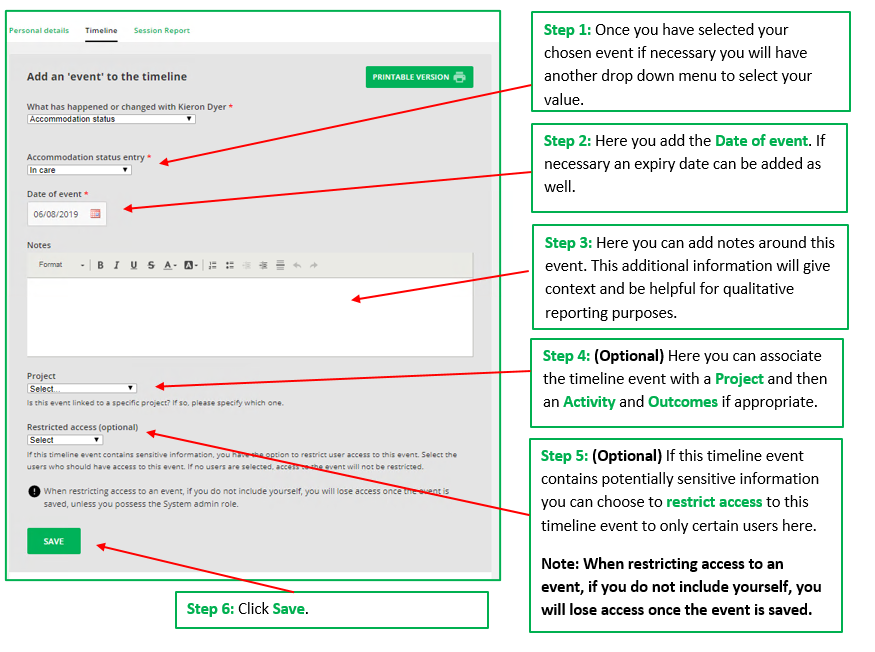
Once you have chosen which event you want to add, you will have the option to add a few more details, this could be text or numbers.
There may be a second subset of options that allows you to be more specific about this event. For example for Referred to you would get the option to select who they were referred to in a second list.
The timeline event example on the next page shows that for Accreditations, you can specify the accreditation they have achieved, the day they achieved it and the expiry date (if necessary). You can also add notes to the event. These additional notes can give context and detail and are really helpful when building up this case study for an individual. There are a variety of formatting options allowing you to highlight different parts of the text.
You can also choose to associate the timeline events with a specific project, activity and/or outcome if relevant for reporting purposes.
Restricted Access to Timeline Events
Access to individual timeline events can be restricted if required. This may be useful if the timeline event contains potentially sensitive data such as Case Notes that are taken from a 1:1 counselling session for example.
When restricting access, the Timeline Event Value and Notes will be hidden for users not granted access. In the screenshot example above this would hide the Value – ‘In care’ and any additional Notes around this event.
To restrict access simply select the names of the users that do need to access the timeline event. All users not selected will not have access to this event. If no one is selected the timeline event will not be restricted.
Make sure to include yourself if needed when restricting access to an event, otherwise after the event has been saved you will lose access to the timeline event.
All users that are given restricted access to an event can update who else has restricted access to that event. System Admins can also perform this function even if they are not in the restricted access set.
When on an individual's timeline, users will see the following if events have been restricted:
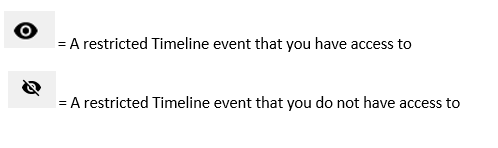
For restricted events users will only see the type of timeline event who initially posted the event and who last changed the Access Restrictions

Note I: When restricting access to timeline events it is important to consider which users may need access to this timeline event for reporting purposes in your organisation. If unsure do not choose to restrict access to the timeline event and contact your System Admin.
Note II: System Admin’s can update their own and other users access to restricted timeline events in bulk if required for reporting purposes, please click here to find out more.
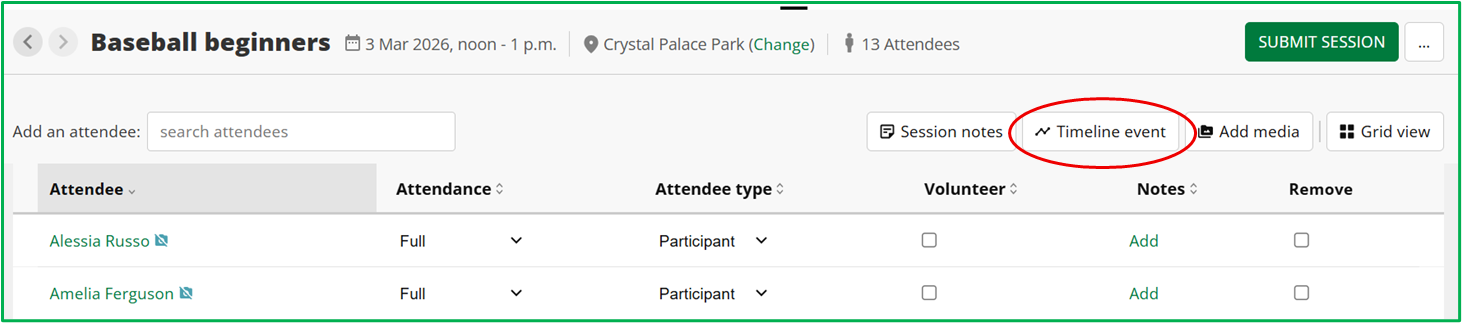
Adding Timeline Events from a Session Register
You can also add timeline events from a session for individuals or multiple attendees. This can be done from a session register.
On the Session Register at the top of the screen click Timeline event.
You will be presented with the list of Timeline Events. Once selected the following pop up screen will appear:
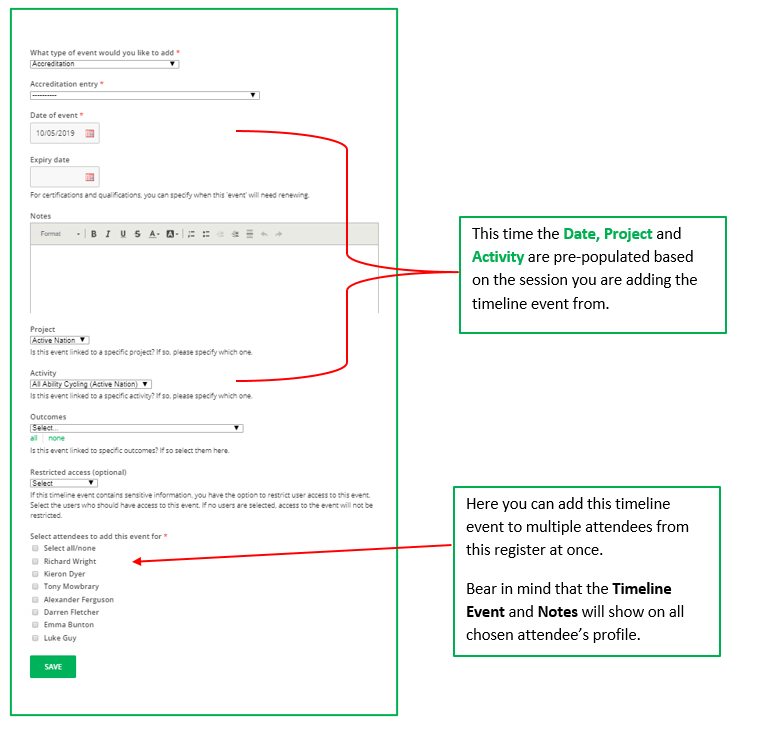
Once you have finished click Save.
You can Edit or Delete specific timeline events from attendees’ profiles if necessary.
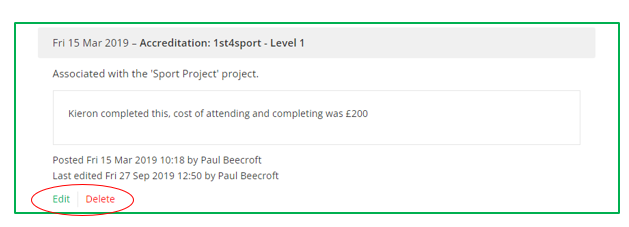
Editing can include editing the detail of the event itself, or any of the relevant associations (Project, Activity, Outcomes) and restrictions.
Note: When adding Timeline Events directly from a session register, the Outcomes available will only be those associated to the Activity the session belongs to.


